![Holistiplan Logo (800x200 px).webp]](https://help.holistiplan.com/hs-fs/hubfs/Holistiplan%20Logo%20(800x200%20px).webp?width=160&height=40&name=Holistiplan%20Logo%20(800x200%20px).webp)
The Asset Diagram Tool helps visualize client assets and their distribution through table or diagram reports. It’s allows for updates as asset values and beneficiaries change.
Create multiple scenarios and review annually with your clients to keep track of beneficiaries, staying up to date with any changes.
To maximize the tool's effectiveness:
- Create an asset diagram that includes an inventory of client assets today. This should cover:
- Retirement Accounts
- Life Insurance & Annuities
- Investment Accounts
- Bank Accounts
- Real Estate
- Model the asset distribution tomorrow. This helps you visualize how assets flow from owners to beneficiaries.
Creating Your First Scenario
To get started on your first Asset Diagram, navigate to the Estate-Asset Diagrams section of the client Household screen and click Create Asset Diagram.

Give your Asset Diagram a name and click Create.

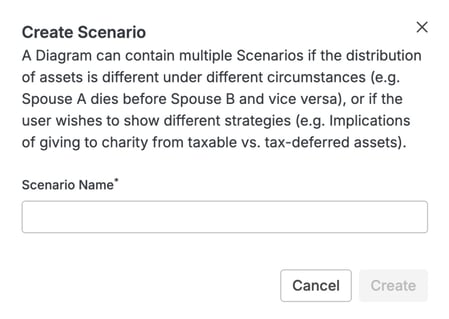
Then, name your scenario.
Common scenario examples are when one spouse passes before the other spouse, the second spouse dies, and for the utilization of Charitable Trust Vehicles (CRUT, CRAT).
Choose a view for entering data: Diagram View or Table View.
Using one view for all data entry works best. Switching between the two views is also an option, for example, entering data in one view and reviewing it in the other.
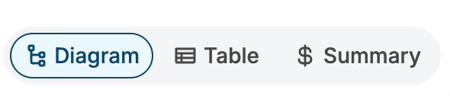
Diagram View shows a visual diagram of who receives each asset, similar to a PowerPoint slide.

- Table View puts the data in rows, one line at a time, much like an Excel spreadsheet of the same information.

- Summary View lists every entry made in Diagram View or Table View in one place.

Editing a Scenario and Adding Assets
The tools on the left side of the screen are used to build out the scenario. Each scenario can include up to 3 events, such as “Today,” “After Paula Passes,” and “After Peter Passes.”
[Screenshot, centered: the scenario tools on the left side of the screen]
Choosing Between Assets and Asset Groups
Before adding the client’s assets, decide whether each one works best as a single asset or as part of an asset group. Choosing the right one makes the final deliverable clearer and easier for clients to read.
Assets
Best for a single account with its own ownership structure.
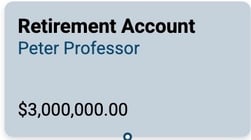
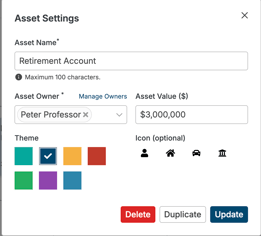
To add an asset, click on the plus sign and fill out Asset Settings accordingly.

- Enter a name for the asset, such as “Peter’s Retirement Account.”
- In the Asset Owner field, select the owner or owners of this asset.
- Click Manage Owners, to the right of the Asset Owner field, and add every owner the client’s assets will use. For example: Spouse #1, Spouse #2, and Spouse #1 & #2 (JTWROS, Joint Tenants with Right of Survivorship).
- It’s recommended to add all of the asset owners at the beginning, but you can go back and edit, delete, or add more at any time.
- Select a color for the asset. Using one color per account type keeps the diagram easy to read. For example, red for all brokerage accounts.
- (Optional) Choose to use icons to further visualize and categorize your assets.
- Click Save, or click Save & Add Another to add the next asset.
- To make adjustments to an asset or asset group, simply click the asset you wish to change and the asset settings will reappear
Asset Groups
Best when the client has:
-
-
Several similar accounts with the same ownership structure, such as checking, savings, and money market accounts.
- A collection of valuables, such as art or automobiles.
- A range of assets owned by a single entity, such as an LLC or a trust.
-
Add an Asset Group by clicking on the picture icon and filling out the Group Asset Settings.

- Enter a name for the asset group, such as “Checking and Savings Accounts.”
- In the Asset Owner field, select the owner or owners, or click Manage Owners to add a new one. For jointly owned assets with a right of survivorship, select the JTWROS owner.
- Click Add Asset to add each account or asset to the group.
- Enter a label and value for each account.
- Select a color for the asset group.
Duplicating Events
After setting up the first event, usually the starting point called “Today,” duplicate it to create the next event.
- Click the duplicate icon on the event.
- When prompted, enter a name for the new event, such as “After Peter Passes.”

The scenario usually decides which event comes next. For example, a scenario named “Peter Passes” shows who receives each asset if Peter passes away first, so its second event covers what happens after Peter passes.
Duplicating a Scenario
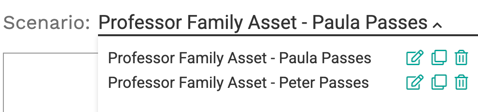
Duplicating a scenario makes it easy to compare outcomes, such as what happens if Paula passes away first versus Peter.
- Click the scenario name next to Scenario to open the list of scenarios.
- Click the duplicate icon next to the scenario to copy.
- When prompted, enter a name for the new scenario, such as “Professor Family Asset - Peter Passes.”
- Change the new scenario’s events to match it. For example, switch which spouse passes away first.
Indicating Ownership of Assets in Events
After assets are added to more than one event, link them to beneficiaries to show how each asset is distributed.
Be sure to create a separate asset for each person owning the asset in the new event before indicating ownership.
- In the new event, click the asset to open it.
- In the Asset Owner field, select the person who inherits the asset in this event.
- In the earlier event, click the + at the bottom center of the asset’s tile.
- Drag the line down to the matching asset in the new event.
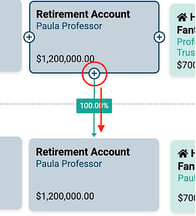
- Select the distribution type.
- Enter the distribution percentage or amount.
- Repeat steps for each asset.
This video walks through how to use the Asset Diagram: