💡 Please keep in mind that SSO with Holistiplan is Service Provider (SP) Initiated only. When you complete your setup on the Holistiplan side, a "Magic Link" will be generated for you. This is a direct SSO sign-on link that can be used in your Identity Provider to mimic an IDP initiated flow if desired.
Google Admin Setup
1. Open your Google Admin console and navigate to Apps > Web and Mobile Apps. Once there click on Add App and select Add custom SAML app
2. Enter your Applications name (This can be anything but preferable something to tie it to the Holistiplan platform)

3. Download the IdP metadata file provided by Google, we will use this later in our set up

4. Next we will need to set the ACS URL along with the Entity ID and the Name ID. Find the values for each written below and in the following screenshot:
ACS URL: https://app.holistiplan.com/sso/complete/saml/
Entity ID: https://app.holistiplan.com
Name ID Format: UNSPECIFIED
Name ID: Basic Information > Primary email

5. Add in the additional SAML attribute mapping of Primary email to email

Holistiplan Firm Admin Setup
-
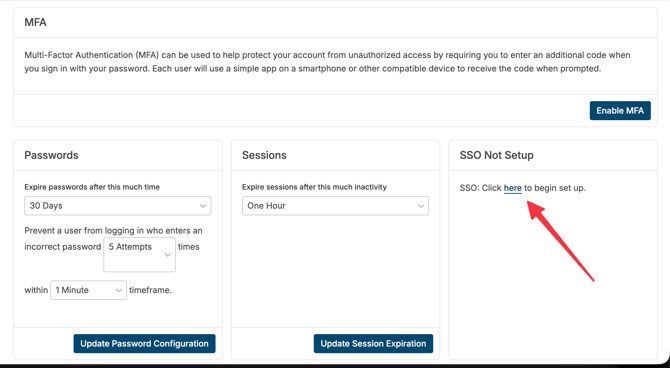
Log in to your Holistiplan application and navigate to
Settings > Features & Tools > General -
Ensure that SSO Self Serve is enabled.

-
Once enabled, click on Security in the left hand menu to find the SSO Configuration box where you can begin setup.
-
Select Google as your Identity Provider.
-
Click on Google Settings within the configuration box.
-
Under Import from XML, upload the metadata file you downloaded from Okta.
This will auto-populate the required fields. Review that the details appear correctly, then click Submit.
-
Choose your preferred authentication option:
-
Enable SSO – Users can log in via SSO or with a password.
-
SSO Only (no passwords) – Users must log in through SSO exclusively.
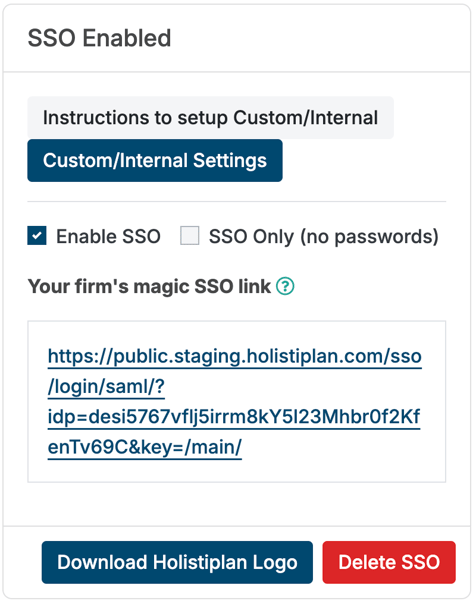
-
After this your setup is complete! Feel free to log out and log back in via SSO.
If you're still experiencing any issue or having any trouble with this setup, reach out to support@holistiplan.com