Setting Up Single Sign-On with Okta
This article will run you through how to set up SSO between Okta and Holistiplan
Before you begin: Holistiplan supports Service Provider (SP)-initiated SSO only. When you complete your setup on the Holistiplan side, a “Magic Link” will be generated — this is a direct SSO sign-on link you can use in your Identity Provider to mimic an IDP-initiated flow if desired.
Okta Admin Setup
-
In Okta, navigate to the Admin page, then go to Applications.
-
Select Browse App Catalog and search for Holistiplan SSO.

-
Click Add Integration.
-
Check the box to ensure the icon is not displayed to users.

-
Click Done.
-
Go to the Single Sign-On tab, then copy the Metadata URL and download the metadata as an XML file.

This concludes the Okta portion of the SSO configuration.
Holistiplan Firm Admin Setup
-
Log in to your Holistiplan application and navigate to
Settings > Features & Tools > General -
Ensure that SSO Self Serve is enabled.

-
Once enabled, click on Security in the left hand menu to find the SSO Configuration box where you can begin setup.

-
Select Okta as your Identity Provider.
-
Click on Okta Settings within the configuration box.
-
Under Import from XML, upload the metadata file you downloaded from Okta.
This will auto-populate the required fields. Review that the details appear correctly, then click Submit.
-
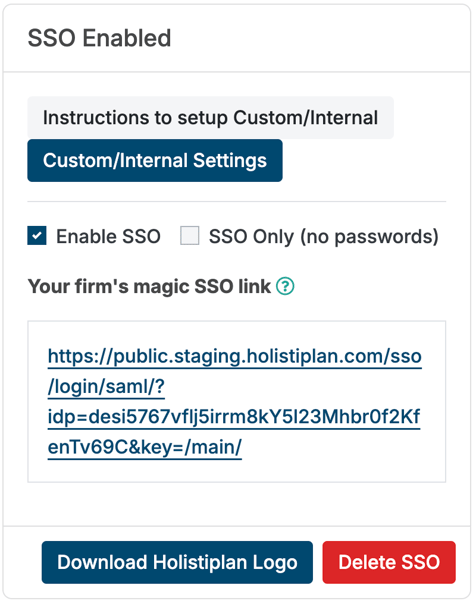
Choose your preferred authentication option:
-
Enable SSO – Users can log in via SSO or with a password.
-
SSO Only (no passwords) – Users must log in through SSO exclusively.

-
-
Copy your firm’s Magic Link. Use this link to create a Bookmark App in Okta, following Okta’s documentation here for setting up a bookmark application using the Magic Link.
After this your setup is complete! Feel free to log out and log back in via SSO.
If you're still experiencing any issue or having any trouble with this setup, reach out to support@holistiplan.com